Migrate Tables: From External to Managed Tables
Managed tables offer numerous benefits, including predictive optimization and performance improvements, which we discussed in our previous blog.
When starting a FinOps project to cut costs, migrating tables is often the first priority, but maintaining business continuity is equally critical. So how do you migrate tables while keeping the same name in Unity Catalog (for example, keeping catalog.my_schema.my_table as catalog.my_schema.my_table)?
Luckily, thanks to runtime 17.0 (although some of the functionality has been there more recently, since 17.2), there’s a solution:
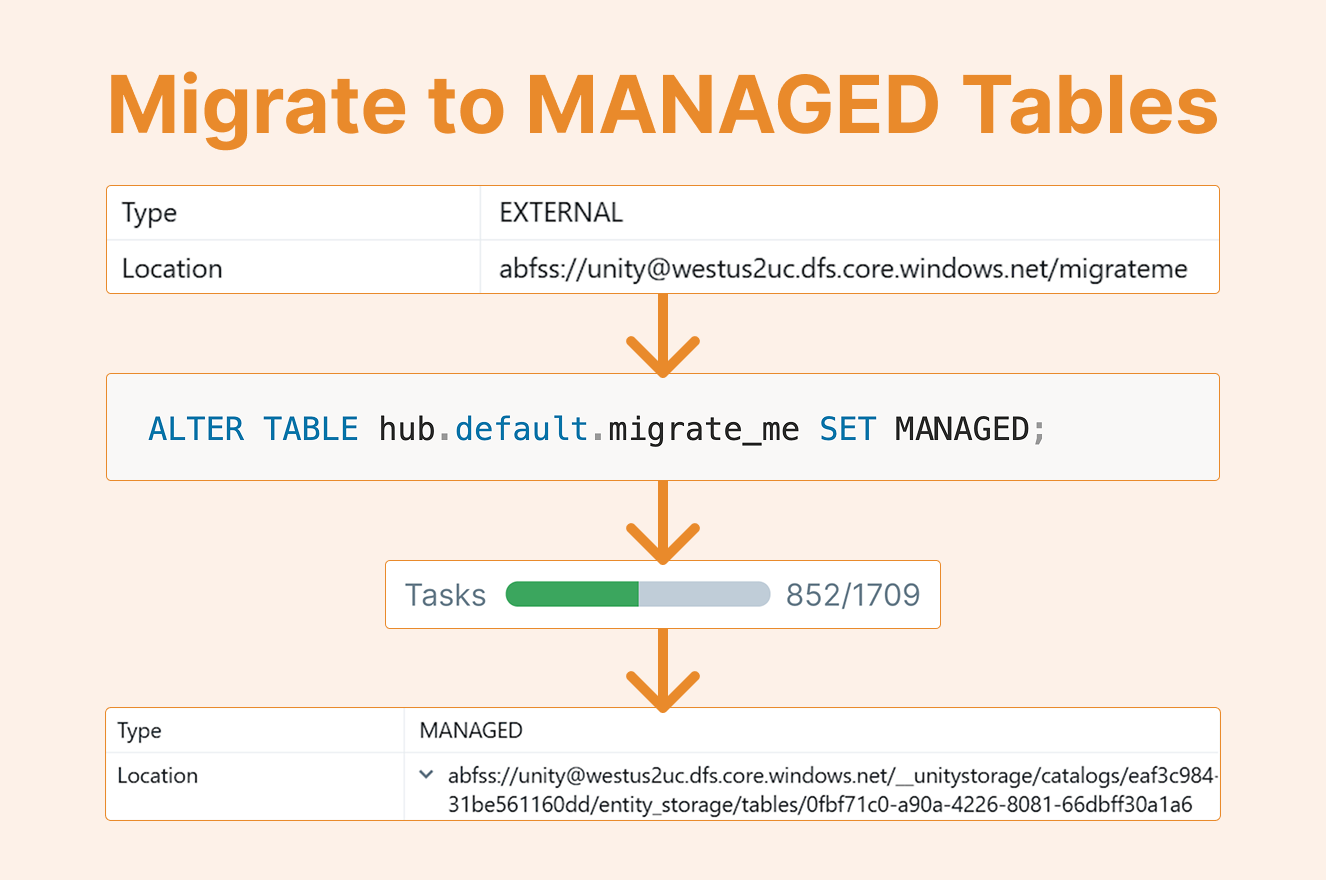
ALTER TABLE … SET MANAGED
Let's Test It Out
Here's how it works in practice. First, we'll create an external table and populate it with a few rows of sample data:
CREATE OR REPLACE TABLE hub.default.migrate_me (
  order_id     BIGINT,
  total_amt    DECIMAL(12,2)
)
LOCATION "abfss://unity@westus2uc.dfs.core.windows.net/migrate_me";
INSERT INTO hub.default.migrate_me (order_id, customer_id, order_ts, total_amt) VALUES
  (1001, 250.00),
  (1002, 125.50;
Next, we run the migration command:
ALTER TABLE hub.default.migrate_me SET MANAGED;
What Happens During Migration
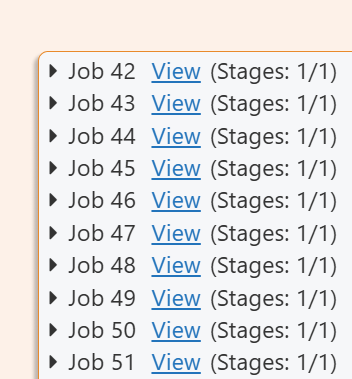
The migration process takes some time. Even for our small table, it executes approximately 50 Spark jobs! This complexity exists because Databricks builds in rollback capabilities to ensure data safety.
After migration completes, you'll notice that:
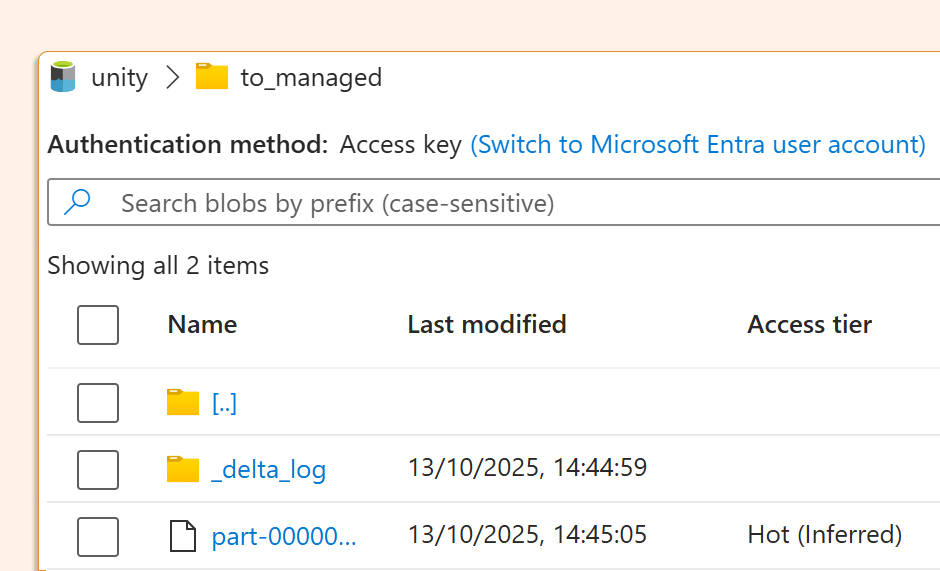
Files remain at the original external location
The table metadata now points to the schema (or catalog) managed location
But if we run the DESCRIBE command or look in Unity Catalog, we can see that files have been moved to the schema (or catalog) managed location by running:
DESCRIBE EXTENDED hub.default.migrate_me;

Important: Since external tables may be used by external processes, Databricks doesn't automatically delete the original files. You must manually clean up the external location after migration, otherwise, you'll continue paying for duplicate storage.
UNIFORM
If you're using Delta Universal Format (UniForm), use this syntax:
SET MANAGED TRUNCATE UNIFORM HISTORY
Potential Issues and Solutions
Be aware of these common challenges:
Streaming consumers: If your table is consumed as a stream, you'll need to restart the stream after migration
Delta Shares: Any existing Delta Shares must be recreated
Concurrent migrations: Never execute two
SET MANAGEDcommands simultaneously on the same table as this can leave the table in an inconsistent state
Always validate your data after migration!
Rollback Option
If something goes wrong, you can rollback within 14 days:
ALTER TABLE catalog.schema.my_managed_table UNSET MANAGED
Note: The 14-day rollback window assumes default retention. If you've configured VACUUM with a shorter retention period (e.g., 2 days), your rollback window shrinks accordingly. After VACUUM runs, you'll have gaps in the Delta log that prevent automatic rollback.
Conclusion
Migrating external tables to managed tables in Databricks is now straightforward with the SET MANAGED command. Just remember to plan for cleanup, validate your data, and be mindful of dependent processes like streams and shares.